Halloween 2015 : Maleficent and Prince Phillip
Have it be known that not only do I love Jennifer Lopez movies, but I LOVE movies featuring Angelina Jolie! I absolutely adore her style of acting—even in sad movies like Changeling (it's a must see AND directed by Clint Eastwood)! That being said, I naturally fell in love with the Maleficent movie and the new take on Sleeping Beauty. I won't ruin the story line, but you'll just have to fall in love with it like I did. Be sure to also listen to the hauntingly beautiful song "Once Upon A Dream" sung by Lana del Rey!
The following images served as our reference photos :


-2015-
Maleficent and Prince Phillip
OUTFIT AND ACCESSORY DETAILS
MALEFICENT
THE HEADPIECE
I was initially so excited for these costumes! Craig's costume required a few simple DIY projects, and I figured that mine would be so easy to put together as I would enlist eBay to be my best friend! I was SO determined not to procrastinate this year that I ordered my dress, gloves, and my horns way ahead of time! I was so proud of myself!
Unfortunately, all of my excitement came crashing down when my horns came in the mail. Let's just say they reeked of latex, they would not fit my head and kept sliding off, and the horns themselves looked absolutely ridiculous and NOTHING like the eBay picture. I was screwed and I was not about to purchase anything else—or send them back to China. So began my research to create the horns myself. If only I had been aware of what a RIDICULOUS undertaking that was going to be—full of sticky papier-mâché, hot glue burns, and spray paint!
I ended up watching multiple videos on YouTube and finally found a couple of tutorials that I felt I could merge together to create the perfect set of horns. Unfortunately, one of them is no longer available, but you can find the other one here. The link shared is what I used for the structure and detailing of the headpiece and I used the “no longer available” tutorial for creating the actual horns themselves. I did tailor them to how I wanted them to look so I used a lot more black electrical tape and elongated and shaped the horns to look more like Maleficent's. As you’ll read below, you’ll see what I used for the finishing touches of this complex headpiece!
DRESS AND ACCESSORIES
My dress didn't need much doctoring, but the winged shoulder pieces were a bit floppy so I hot glued thick pipe cleaners (found at Hobby Lobby or Michael’s) underneath to be able to manipulate the height and volume. JOANN Fabrics also became my best friend during this Halloween season. For the obsessed fabric lovers, I’m sorry I carted the last of the pleather and probably bought way more of the material than I actually needed. Remember, I don't sew and I like to look like know what I'm doing!
Using a small amount of the pleather and a couple of button snaps, I created my neck piece. I used the rest of the pleather to wrap around my headpiece, folding the layers as I went and folding the end pieces around the base of the horns. And yes, I used a ton of hot glue to do that. After SO much time on those horns, I was extremely pretty proud of my efforts!
I was a little worried that I wouldn't find a crow to sit atop my "staff", but I eventually found one At Home—the store! ;) He looked a little strange with some feathers missing and his skeleton showing, but I bought him anyway, spray painted him black, and added more black feathers to fill in his hollow areas.
For my staff, I bought a dowel rod at Home Depot and spray painted it black as well. Using a deep turquoise craft paint, I painted a styrofoam ball and then used black electrical tape to cover half of it. I hot glued the ball to one end of the dowel rod and used a combo of hot glue and wire to attach the crow.
MAKEUP
Before we dive into my makeup look, I did take a detour away from the nails that Angelina wore—fake nails aren’t my jam! Plus, I was scheduled to do makeup for a wedding the next day and I simply didn't want to deal with keeping or removing artificial nails and wanted to be comfortable while doing my job. So instead, I whipped out my trusty black polish and that was that. Having ditched the nails, the green contacts, and cheekbone prosthetics, I had so much fun with my makeup!
So far, you know I love Jennifer Lopez and Angelina Jolie, but I also LOVE Kat Von D—and her beauty products. And her show L.A. Ink. And her tattooing skills. But back to her beauty products : While no longer available, her Shade + Light Eye Contour Palette is an amazing product if you’re lucky to already have it in your makeup arsenal! Thankfully, by clicking the previous link, you’re now able to customize your own palette! The S+L palette held the best matte shades for my eye look and was absolutely perfect for contouring and chiseling out my face for this particular look! It’s also a great go-to for an every day natural eye look!
I complete my makeup by using Kat Von D’s Everlasting Liquid Lipstick in "Underage Red". This particular shade is extremely hard to find, but she has an amazing variety of other shades with additional reds tones to suit your liking!
Prince Phillip

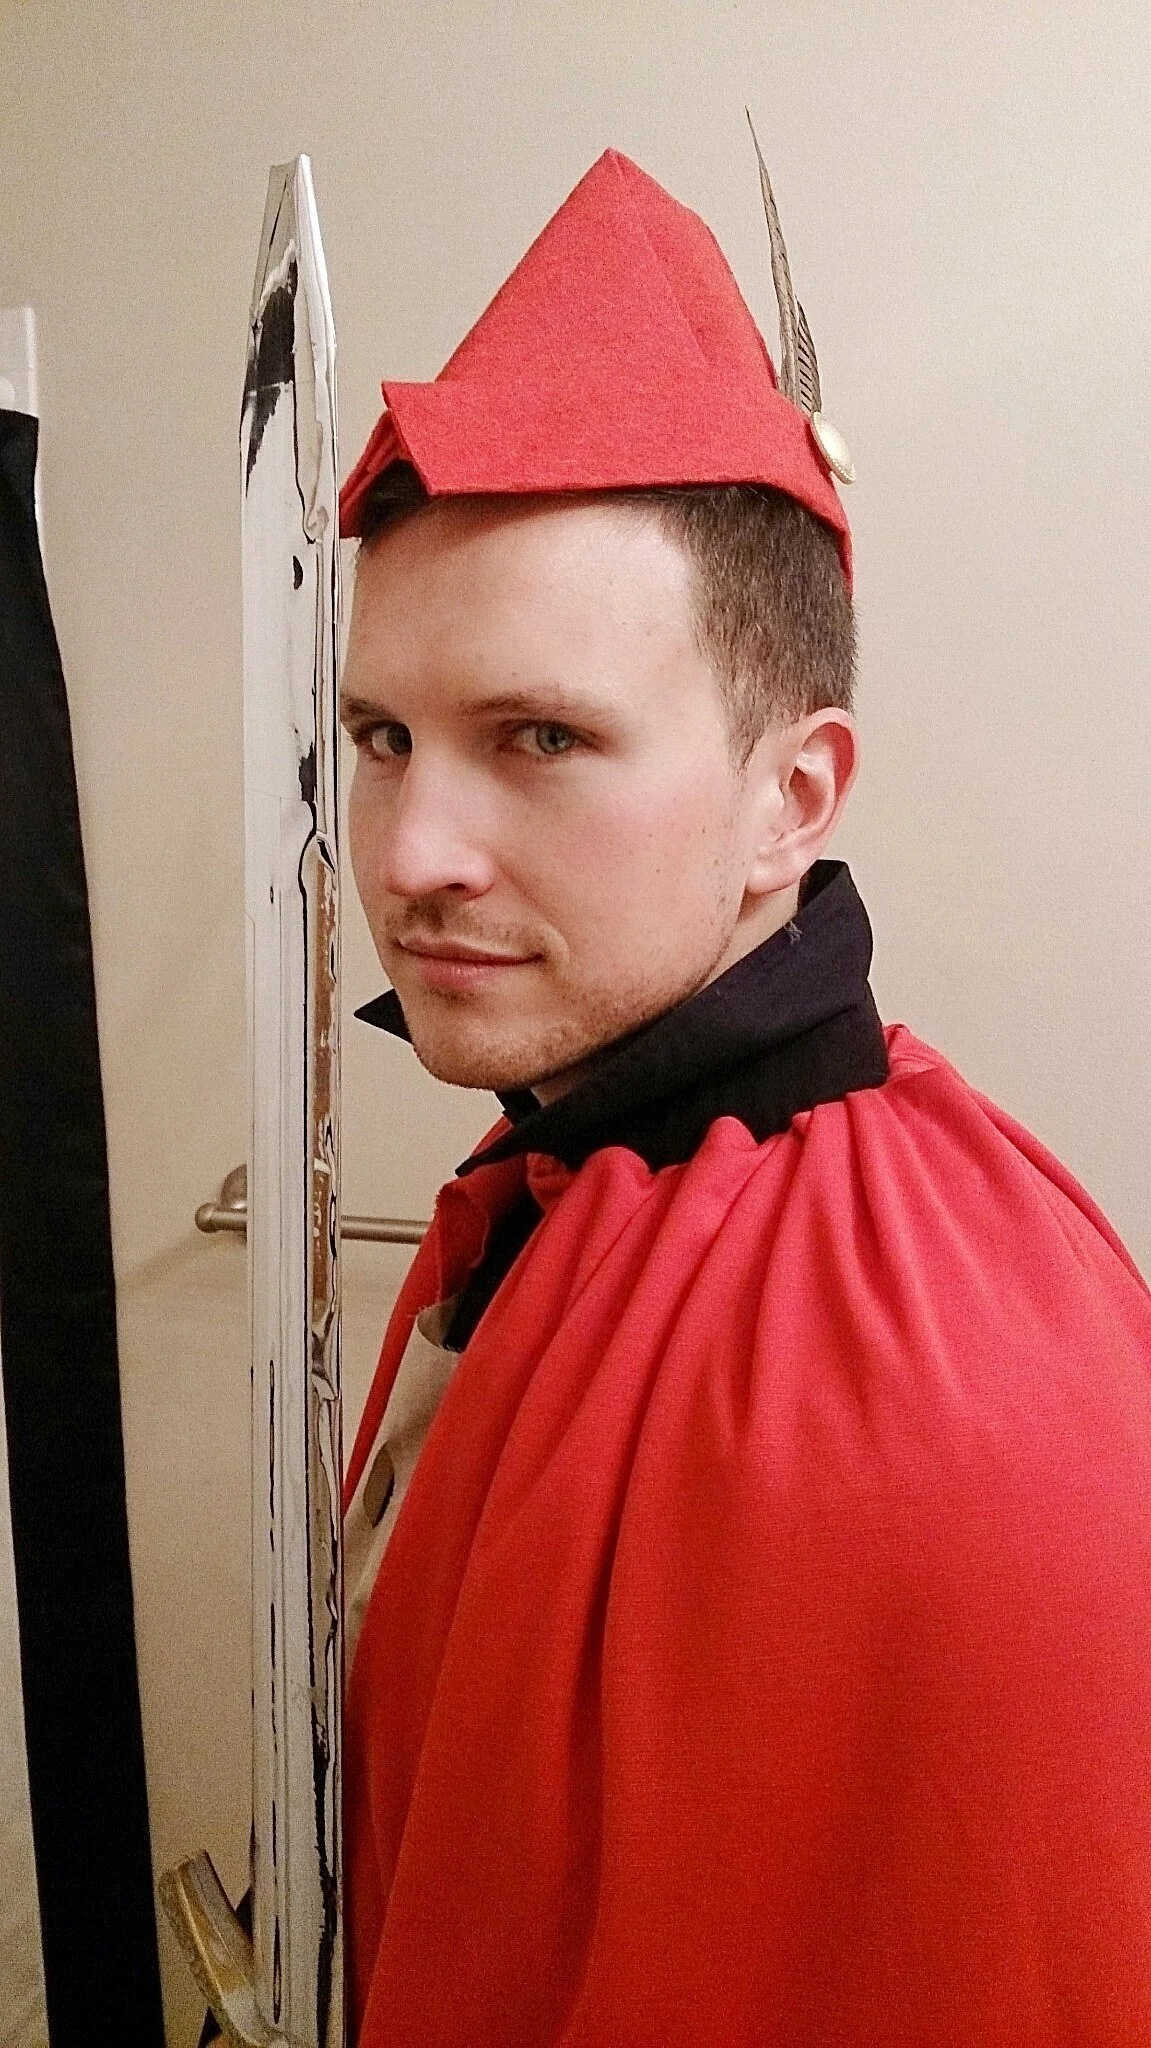

The main part of Craig's costume came together with tan pants from Forever 21 and a black dress shirt from Kohl's. He didn't own either of those items so we didn't feel bad buying both knowing that he'd wear them again! I researched an easy no-sew tutorial for his hat (found here) and it was seriously the easiest thing to make! I bought feathers from Michael’s and a button from JOANN Fabrics to complete it. It wasn't exactly like Prince Phillip's, but it was close enough!
I put off making his cape because I thought it would take forever—plus, the amount of fabric I had bought looked intimidating! But, once I got started, I was done in about 20-25 minutes! Super easy. You can research YouTube tutorials, but I used this blog tutorial and adjusted the measurements to fit Craig!
I then had to attempt to make his tan tunic. It was quite hilarious—remember, I don't sew! MacGyver might have made a better tunic! I just laid out the fabric, guessed at the measurements, and created a sleeveless "poncho" with a cutout for his head to pop through! LOL! I tried it on him and then used Heat Bond strips to close the gaps of material on either side. Yep, that would do it. His cape would cover any mistakes, I was sure of it!
Using one of his own belts to finish off the look, his only other accessory needed was a sword which I found at a Halloween party shop! To keep it from looking too childish, I used chrome tape (found at automotive stores) to make the blade look more realistic.
It's so funny that we pour so much time into these costumes, but like I've said before, we love doing it! We never go to Halloween parties, and sure, a few friends may stop over, but we love dressing up for the kids. Their comments and questions are hilarious! I also think the parents get as much of a kick out of us as the kids do—and I like that. Maybe we'll be "that" house every year.
Sadly, we ran out of candy after an hour, but that's a good thing, right? I purposely didn't buy bags of the full size Reeses for a reason! Even after so much fun, I was SO glad to be done with Halloween this year! Not only did I stress out over our costumes, but I was also creating makeup looks every week for my profile on Instagram! The month of October was chock full of creativity, but I think I'll jump on that wagon even earlier next year!
As always, if you happen to need any inspiration for next year or simply want to check out how crazy and weird we are, be sure to check out my blog post featuring ALL of our Halloween costumes!
And if you love makeup and want to dive in deeper to create makeup looks for yourself, check out my Instagram handle @wrenwood.collective to potentially inspire you!
Unlock your own creativity in 2016 (and beyond)!