Halloween 2020 : The Red Queen and The Mad Hatter
As I write this, spring has sprung in 2021, and I'm hoping for baby bunnies to be found in our backyard!
While I wait for the possibility of a nest full of little ones nestled in the softest of fur to keep them warm, keep reading to see the 11th installment of our Halloween tradition! Ten years of dressing up is a pretty big deal, but we sure do love the number 11 (if you know, you know) and this particular Halloween season was made for pulling out the stops!
This was also our first year recycling an entire costume. I had wanted to bring Craig back as the Mad Hatter at some point, and being that we both appreciate Helena Bonham Carter and the array of characters she has played, our costume idea was easily decided.
In a world full of jabberwockies and people gone mad, I think you could say that the year 2020 took us back down the rabbit hole!
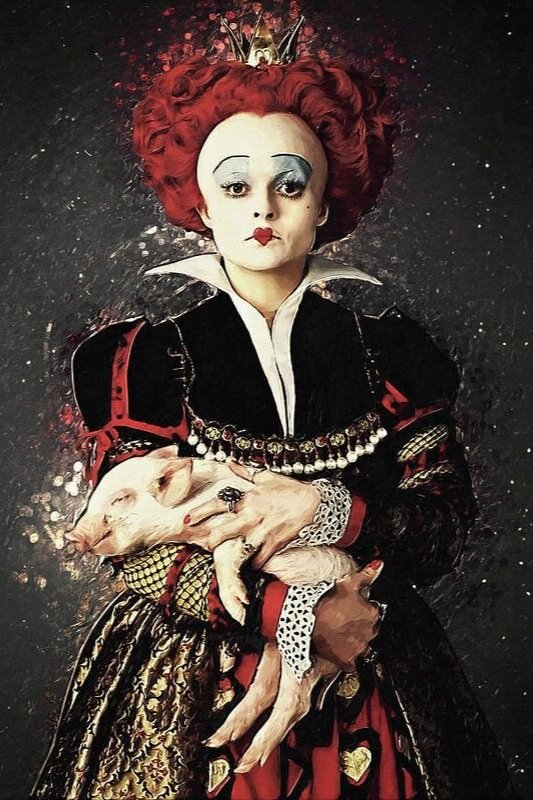
The following images were our reference photos (also featuring a blast from the past) :


-2020-
THE RED QUEEN AND THE MAD HATTER
OUTFIT AND ACCESSORY DETAILS
THE RED QUEEN


THE DRESS
What a task to find a dress like the Red Queen's! Thrift stores didn't have anything in their costume sections and creating it from scratch would take too much time and fabric (not to mention hot glue and safety pins) to replicate the entire outfit. Honestly, I was more concerned about the makeup and accessories coming together for both the Mad Hatter and I than I was about my dress. That being said, I allowed myself to take it easy with the dress and settled for purchasing the Disney made costume version from eBay. I appreciated that this dress was very similar to the original design, but being that it wasn't an exact, and from my prior experiences, I knew that I would most likely need to do a little bit of work and add to it—nothing a quick trip to Hobby Lobby and a quick inventory check on my hot glue sticks couldn’t handle!
When the dress arrived, it was a mass of fabric and pretty perfect. The only downside was that the gold flecks of glitter attached to that pretty mass of fabric would end up showering over any surface! I knew then that Kate Spade had said it best—I was literally going to leave a little (or a lot) of sparkle wherever I would go! The grand upside was that the only doctoring needed for this dress was to create a 3D illusion of jewels in the front! Using pearls and jewels in the shape of hearts, I hot glued them right onto the screen printed jewels on the front of the dress—and surprisingly, they all stayed in place the entire night!
THE EXTRAS
With my dress ready and waiting for the big night (and still shedding glitter while even resting on the hanger), my attention turned to the Red Queen accessories.
I nonchalantly looked around thrift stores and the Halloween store for something that could work for my scepter, but oddly, found nothing. I knew it wouldn't be hard to make and ended up shopping my craft stash at home before making another trip to Hobby Lobby. Buying a dowel rod and pairing that with paints, a styrofoam ball, and stickers from my stash I soon created a differently designed yet similarly threatening “off with their heads!” kind of scepter.
Speaking of heads, and after a quick online search, my wig was purchased on Amazon. While I had read the reviews about the fit being a bit small, I truly didn't have a better option and was not about to try and make my own! For the amount of curls it had, it certainly looked like a bigger wig, but the fit was indeed a too small! Shoving it on my head and securing it with bobby pins was the best I could do!
And, of course, the Red Queen thought it best to have a tiny crown nestled into her massive head of curls. My favorite accessory to create, I found a tutorial on YouTube that I could use as my starting point and made the rest of it up as I went along—and I was happy to shop my craft stash (and my pantry) once again for everything that I needed! Securing my cute little DIY crown into my wig with ribbon and more bobby pins, and with a quick grab from our dresser’s jewelry tray for fashion rings to match, this queen was ready for a meeting with the Mad Hatter!
THE MAKEUP
Ooof, the makeup. Knowing how I work, I had literally written out a timeline for the day of Halloween as I would also need to allot time to doing Craig's makeup. Starting around 3pm in the afternoon (for a 7pm candy handout), I started to glue my eyebrows. First things first, yes? Once the glue was set, I brought out my face paint palette and painted on those ever thin and hilariously high eyebrows and made my way down to cover both eyelids in blue paint. Once the paint was dry, I used a variety of blue eyeshadows to accentuate the area and applied a thin line of black eyeliner to the top lash line, smoking it out towards my lower lash line. Wispy false lashes finished off the eye look, but I wasn’t done yet!
Now that the most intricate parts of this makeup look were complete, I quickly painted the rest of my face white, and using a matte gray shadow, contoured my nose, cheekbones, and chin. Learning from the first Mad Hatter makeup application, I also made sure to apply the white paint down my neckline and lightly onto my hands to stay true to the pale skin of the Red Queen. Last but not least, my favorite parts of this makeup look were drawing on the heart lips and carefully adding the mole under the left eye.
THE MAD HATTER


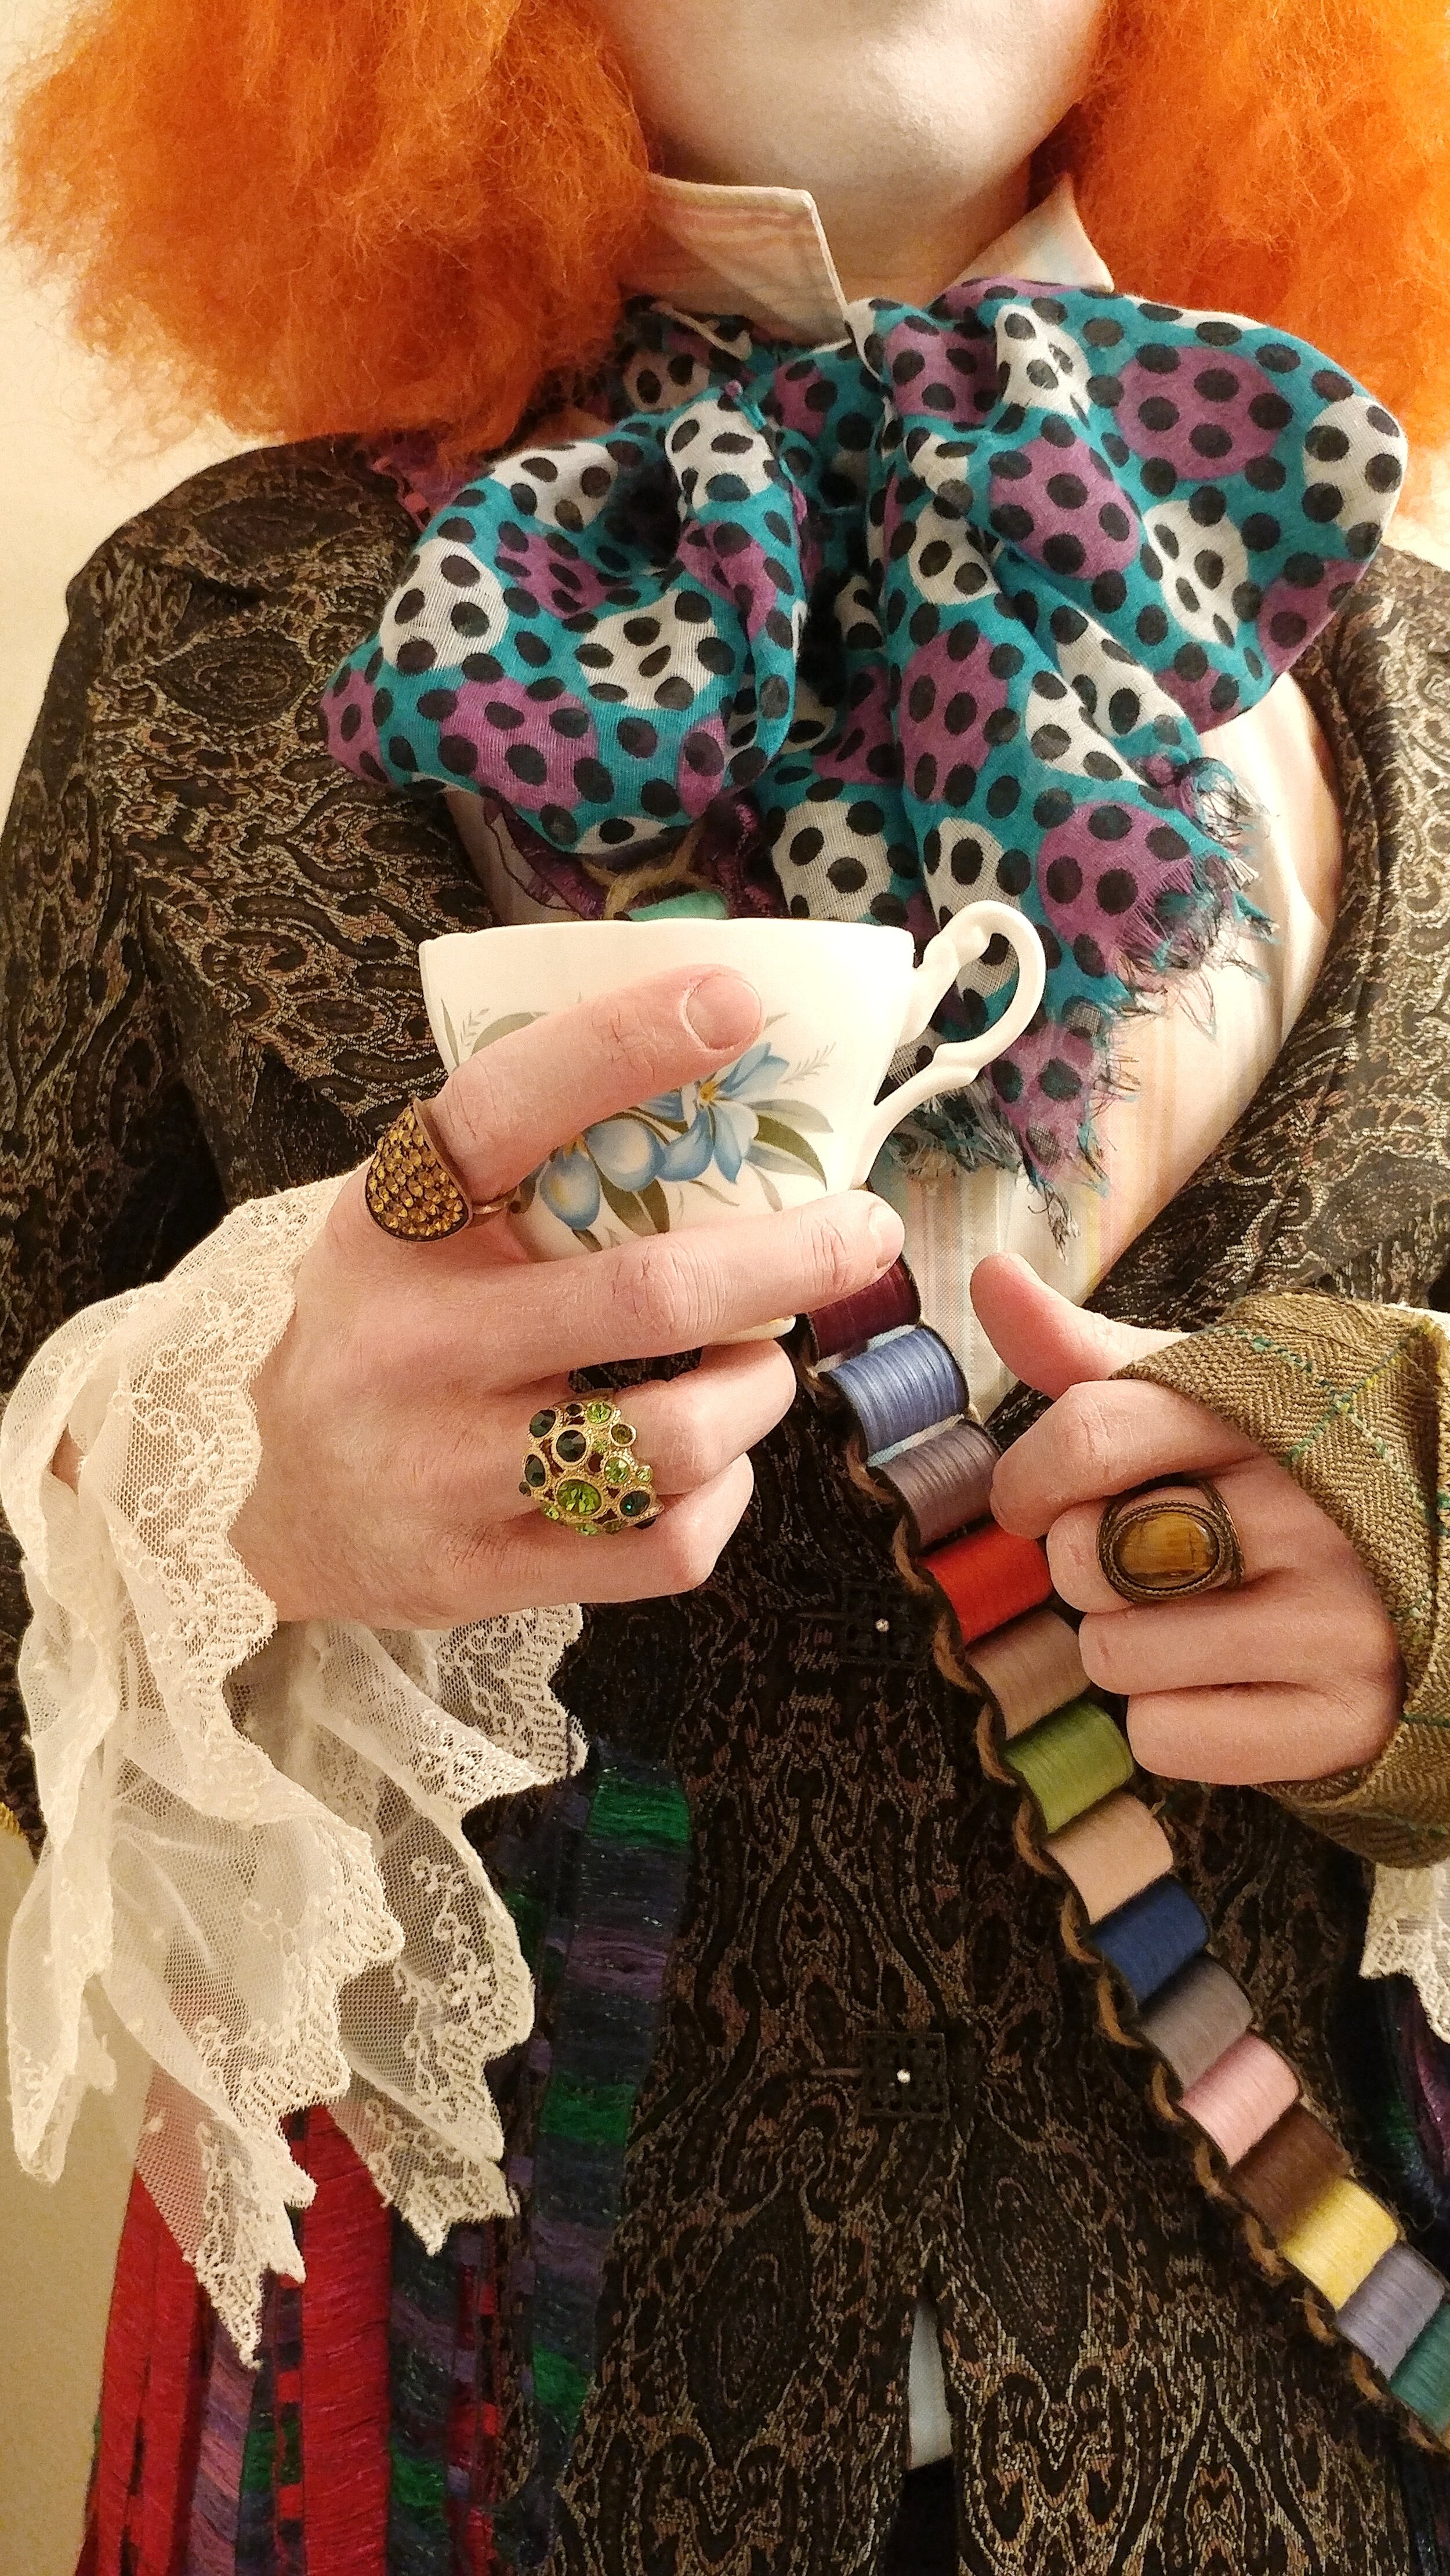

Being that this was Craig's second time around to dress up as the Mad Hatter, and for those who are curious, I already have a fun post going into depth of how the core pieces of his costume and makeup details came together the first time around! We're all a little mad here if we think I'll be typing out all of those details again so be sure to make your way over to see even more photos and read how that bit of mad magic first began!
It was so incredibly fun to see Craig step into character again! Perhaps it was the familiarity of the character costume and the makeup, but he really brought the Mad Hatter to life again and had me laughing much of the night!
NEW ADDITIONS
Sifting through our "Halloween Closet" and pulling pieces to bring the Mad Hatter back to life, I realized that some of those items were long gone and I would have to replace them! Thankfully, I didn't need much, and the new additions to the costume could be easily thrifted or found for less than $3—new socks, pants, and a striped button down shirt! And in true Mad Hatter fashion, all mismatched styles, of course.
FUN FACT
The Red Queen may like to have warm pig belly upon which to rest her achy feet, and while that sounds oddly cozy and toasty, we do not have that interesting luxury. However, we DO subscribe to the idea of owning unique footstools and have our very own dinosaur (triceratops) shaped footstool that makes an adorable focal point in our living room! I surprised Craig with it a few years ago upon him returning home from a very long trip and it's one of our very favorite and beloved decorative pieces! You can find your own right here!
“What a regrettably large head you have. I would very much like to hat it!”
We loved bringing back a beloved (and eccentric) character and this time contrasting him against a not-so-beloved (but equally as strange) character!
To be honest, I sometimes question myself during the creating process of these costumes. Like, WHY are we putting so much effort into this again? We never go to parties or contests, let alone host any, and the people that see us in person on Halloween are very few. However, keeping up a tradition with my best friend, creating memories, and having years worth of such fun pictures (and blog posts!) to look back through truly can’t be beat. Also, the half off Chipotle that a Halloween costume can buy you should never go to waste (yet another tradition of ours).
After deeming this season a fun and challenging success in our eyes, we can only be inspired to dream up next season’s couples costume! Although I'm not sure we'll be busting out as much face paint!
There are only 6 months left until Halloween 2021—it’s never too early to gather a bit of Halloween inspiration!